Cleaning a bike is something anyone can do. You don’t need any tools, just a bucket and sponge, a couple of old rags and some water-repellent spray (e.g. WD-40). Moisture and dirt accumulate around the chain, cassette and brake callipers, so winter time definitely warrants more frequent cleans! For a deeper clean, try using a brush to get right into the links. The WD-40 can be applied to the chain, cassette and derailers after cleaning to prevent rust forming.
No matter how well you look after your bike, the moving parts will need to be changed from time-to-time. You can purchase parts and fit them yourself if you’re confident, but if you’re not that way inclined then there’s probably a Halfords not too far away! They offer free bike health assessments and their services start from around £35 (although we would recommend the £50 silver service).
* * * * * * * * * * * * * * * * * * * * * * * * * * * * * * * * * * * * * * * * * * * *
When it comes to maintenance, an allen key is a cyclist’s best friend. It’ll likely be that your saddle, brakes, bottle holder(s) and various other components are affixed by bolts that are adjustable with an allen key. If you’re unsure which size fits, or your bike fittings require multiple sizes, get yourself a complete multi-set of 4-8mm keys.


Another necessity is a pump. Word of advice: Buy a foot pump (from as little as £10) in addition to the hand pump that you'll carry with you. Obviously you won’t be riding around with a foot pump in your bag, but having one of these at home will make re-inflating those tyres easier and more efficient. Tyres are the most common part of a bike that need changing, and the less inflated they are the greater the risk of puncture.
Did someone say puncture? Yes, that’s right. It’s every new cyclist’s worst nightmare! Punctures are the cause of so much unnecessary anxiety, partly because you tend not to acquire procedural knowledge until you’ve actually performed the task, but also because they can strike at any time. All cyclists encounter punctures from time to time, and they're nothing to be afraid of.
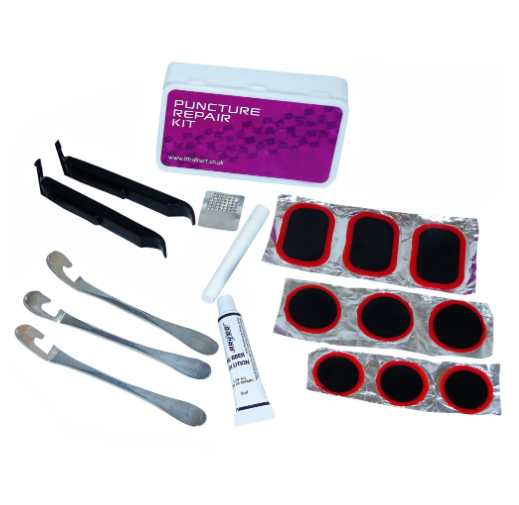
On any ride you should be carrying with you (a) a hand pump, (b) a spare inner tube and (c) a puncture repair kit. The repair kit contains two tyre levers, a strip of coarse material (e.g. sandpaper), a tube of adhesive substance and some sticky patches. If you have time you can affix a patch to the puncture and re-inflate the tyre roadside; otherwise, change the inner tube and repair the old one when you get home. Take a look at the following YouTube tutorial, showing how easy it is once you know how:
How to repair a puncture | Halfords
* * * * * * * * * * * * * * * * * * * * * * * * * * * * * * * * * * * * * * * * * * * *
We would suggest you have your bike thoroughly examined during the week or two leading up to the event, no matter how much you’ve ridden since it was last serviced. If you’re doing this yourself, we’ll leave you with our last-minute checklist below of all the important things to check over ahead of your challenge:
- Clean and lubricate the chain.
- Check brake pads are aligned with wheel rims and function properly.
- Ensure handlebars and saddle are in position and secure.
- Inflate tyres to correct PSI.
- Clear cogs/derailleurs of any impediments.
- Spin pedals and wheels to ensure effortless rotation.
- Make sure your puncture repair kit contains two tyre levers, adhesive, patches and a strip of coarse material, as well as at least one spare inner tube and pump.
- Ensure both front and rear lights work.
- If using a pannier, check weight distribution and ensure it isn't interfering with rear wheel movement.
- If you've recently changed tyres, check the tread and walls (we advise against slick road tyres).
- Make sure any additional accessories (bell, bottle holders, lock mount) are securely attached.